Wednesday 26 October 2011

Classic Voigtlander Perkeo l Medium Format 6x6

Never tried any single-lens 6x6 before, I decided to pick up this Perkeo_l just for fun and convenience. As compared to my heavier though much more reliable Rolleiflex TLRs, this camera is so much lighter and can be very convenient to carry around.
Accordingly, this camera can be haunted by the issue of planarity due to possible wobbling of its bellow when shooting. We just can't have both worlds, can we?


I managed to open up the top plate to clean out any dust while the lens is still very clean despite its age.  It's fully manual mode of shooting can be an issue with exposure values and definitely have to switch on my sunny 16 rule again. If not, my Rollei 35S/T can always tag along and manage the metering issue, just in case!
Meanwhile I am so eager to try out this camera after viewing so many wonderful shots of other users with this classic!
Cheers!

Sunday 16 October 2011

Trying out Konica C35 FD with monochrome 35mm film

A trip to China offered me an opportunity to bring along my rangefinder Konica C35 FD (aka auto S3) for a wild spin. I was much eager to try out the latitude of the Delta 100 Pro and Lucky SHD100New monochrome film and of course the camera's metering and exposure accuracy. Backing this trip with my smallish digital Panasonic DMC-ZR3 just in case I wouldn't miss out on any nice good take.


The chinese-made Lucky SHD100 appears to be smoother (ie the naxi woman & the trail) and less grainier than Delta 100Pro (the woods) though I wouldn't mind using both of them occasionally as long as their price is justified and economical. Knowing their latitude probably make sense for various photographic occasions.

My Konica FD served me well on my trip to Kunming, Dali and lijiang with every opportunity to snap on anything monochromatic- like old buildings and rock etc which is quite redundant anyway for colour films.


Rangefinder cameras are known to rather quiet since there is no noisy flipping mirrors like those SLRs and this Konica did just that during the trip. Adding any colour filters to this camera is easy without any manual adjustment with its TTL's metering.


I definitely have to try out some night scenes with colour films with this camera on my next few takes. By then who knows how those photos might turn out!


My Konica C35FD set can also be viewed in flicker
(http://www.flickr.com/photos/68719137@N04/)

Thursday 26 May 2011

Some films bought from Thailand.

Thailand seems to be the perfect place to purchase some 35mm and 120 films for my cameras . Here are some of the films that I bought in Bangkok few weeks ago. Thailand appears to have many analog camera users around which is reflected by the whole range of films available in their camera shops. Developing those films is not a problem and one can get them ready the next couple of  days which is just  perfect for analog-camera tourists. Compared to Malaysia and Singapore, the films are quite reasonably priced and are never out of stock, well at least at the moment which sounds too good to me and other users. 
Bought some china-made monochromes just for fun and just hope these lower priced films can be made available to us. 

Monday 23 May 2011

Exakta VX1000, "The Last Official Exakta Camera"


Bought this SLR Exakta off UK Ebay and much attracted by its classic East German features. From the appearance of the leather case and the camera itself, I believe the camera was seldom used. All expected mechanism works fine and maybe awkward with the left hand winding and shutter button. It's perfect for my eastern hands too considering this camera was much designed for the big-hands Europeans. No wonder this camera was not popular in the east and no wonder the Japanese cameras captured much of the Asia's market and now the world. 
The interchangeable viewfinder is so bright and comfortable. The interchangeable lens are still very expensive especially those wide angles and zoom lens. Heck, I never want to carry those heavy metal and long lens again and attract much pathetic looks from those digital guys out there! A simple lens for this camera is sufficient for me now. 
Nonetheless, I like this camera and perfect for me! You may read more about this from Wikipedia here.

Enjoy!

Wednesday 9 March 2011

Konica Auto S 1970s'

Bought this vintage off ebay together with another as 'sold as ' and 'don't know it works or not' accompanied with so much free dust all over the lens. A few rather sharp reflected lights off the dusty lens 1:1.9 f/47mm caught my eyes prompting me to take the risk to purchase this. The camera was unexpectedly clean all over after brushing off all the dust and the mechanism is confirmed working perfectly. Quite happy with this purchase with a small outlay for my collection.
The camera is so well built with heavier metal body and the previous owner apparently took good care of this camera.

Tuesday 8 March 2011

Zeiss Ikon Contessamat

Another simple classic from the Zeiss Ikon series of 35mm film camera which needs no battery for its perfectly working light meter. This camera was barely used with its rather new strap and case. The shutter is so quiet and barely audible!
Quite happy to keep this one for my collection.

Voigtlander Vito C


This is another nice camera with a simple but bright and big viewfinder especially when after I cleaned them upon purchasing it from Germany. It works perfectly though it was from the 50s'and it is unexpectedly heavy for a simple camera. The Voigtlander name is pure classic with its classic style. Thought I should have one of these just for my collection.

Monday 7 March 2011

Rollei 35 S Black Body


My black beauty Rollei 35 S of the 70s'! The sonnar lens is supposedly excellent for color but not really for monochrome. Looks solid but make sure we don't get any dings and dents on the easily-dentable soft top cover!


Heck...here my beauty and its smallish lens has also requested for a black collapsible rubber hood shade as if shades is necessary!!

Rollei 35 T

A must-have for me if I am into vintage cameras! This is a smallish fully mechanical Rollei 35 T with a Tessar lens supposedly excellent for monochrome and street photography. Zone focusing with a simple viewfinder enables quick draw and snapping! Snapping and holding this camera is a pleasure! PX625 mercury battery for the light meter but if you don't have it, just use sunny 16 rule for your next spin!

Kodak Retina Ib


A 1950s' Kodak Retina Ib in full working condition with a simple viewfinder which is excellent for zone focusing. It fits my palm nicely though it can be slightly heavy for this size.

Konica C35 FD aka Auto S3.

A superb palm-sized camera with a fast lens of 38mm 1:1.8 suitable for street photography. Apparently this model is relatively scarce.
The camera has been serviced and re-calibrated to take in a commonly found non-mercury LR44 battery.  Here my camera has a orange filter and a monochrome film ready for snapping.

Sunday 6 March 2011

Yashica Lynx 14

Another solid camera in my collection is this 1970s' Yashica Lynx 14 with a fast lens of Yashinon 1:1.4. Holding this camera is a pleasure with the smooth solid metal and quiet shutter mechanism.Has always been protected by its solid leather case, this camera is still going strong with all its mechanism.

Saturday 5 March 2011

Kodak Retina Ib. Micro-surgery on sticky shutter.

Entering the heart of the shutter mechanism of any camera can be intimating especially the first time. Step by step and remembering all the postions of the screws and springs can be invigorating for your brain!

The shutter here is rather sticky caused by some old lubricants and dirt. I have to remove the retarder and timer to view and remove the shutter retainer. Take the opportunity to oil the timer as well later.
Parts piece by piece. They are precision parts and must be carefully handled from here.


There are 3 screws that hold the shutter retainer. One is longer than the rest and make sure the longer one is screwed on the right hand side as shown here. Try switching them and your shutter leaf may not open!


Wednesday 2 March 2011

Rolleiflex f3.5.Cleaning viewing/focusing & taking lens.

 The dirty focusing /viewing lens has prompted me to take them out for cleaning. Here I have disassembled the lens for a thorough checking and cleaning.A explosive view of Rolleiflex models & repair manual can be found here too.
 I take out the taking lens for cleaning too.At the same time, I do a routine checking on other parts to clean out all dirt and old grease, if any. Looks ok to me.
 I have to open up the shutter mechanism to do a checking too. If you have opened up one before, they all look the same except for their positioning within the camera. Here, the timer mechanism has been placed not inside the compur system but taken out and placed on the top left corner.

 Here is the timer on the top left corner. Just take it out and clean it with benzene and add a drop of lubricant if it is not working.Test it a few times before assembling it.
The heart of the shutter mechanism! No rust or any dirt and all seems well otherwise I have to disassemble it piece by piece and lubricate them for a smoother operation. The empty slot is meant for the timer mechanism. Check them out in the kodak retina and you can find them. Disassembling this mechanism takes some time and just be cautious with all the small spring that can bounce out!


 What a beautiful solid camera made in Germany and the leatherette is real leather! Here is my Rolleiflex 3.5 ready for my next spin!

Tuesday 1 March 2011

Rolleiflex 2.8C 1950s'. Cleaning the viewing/focusing and taking lenses.

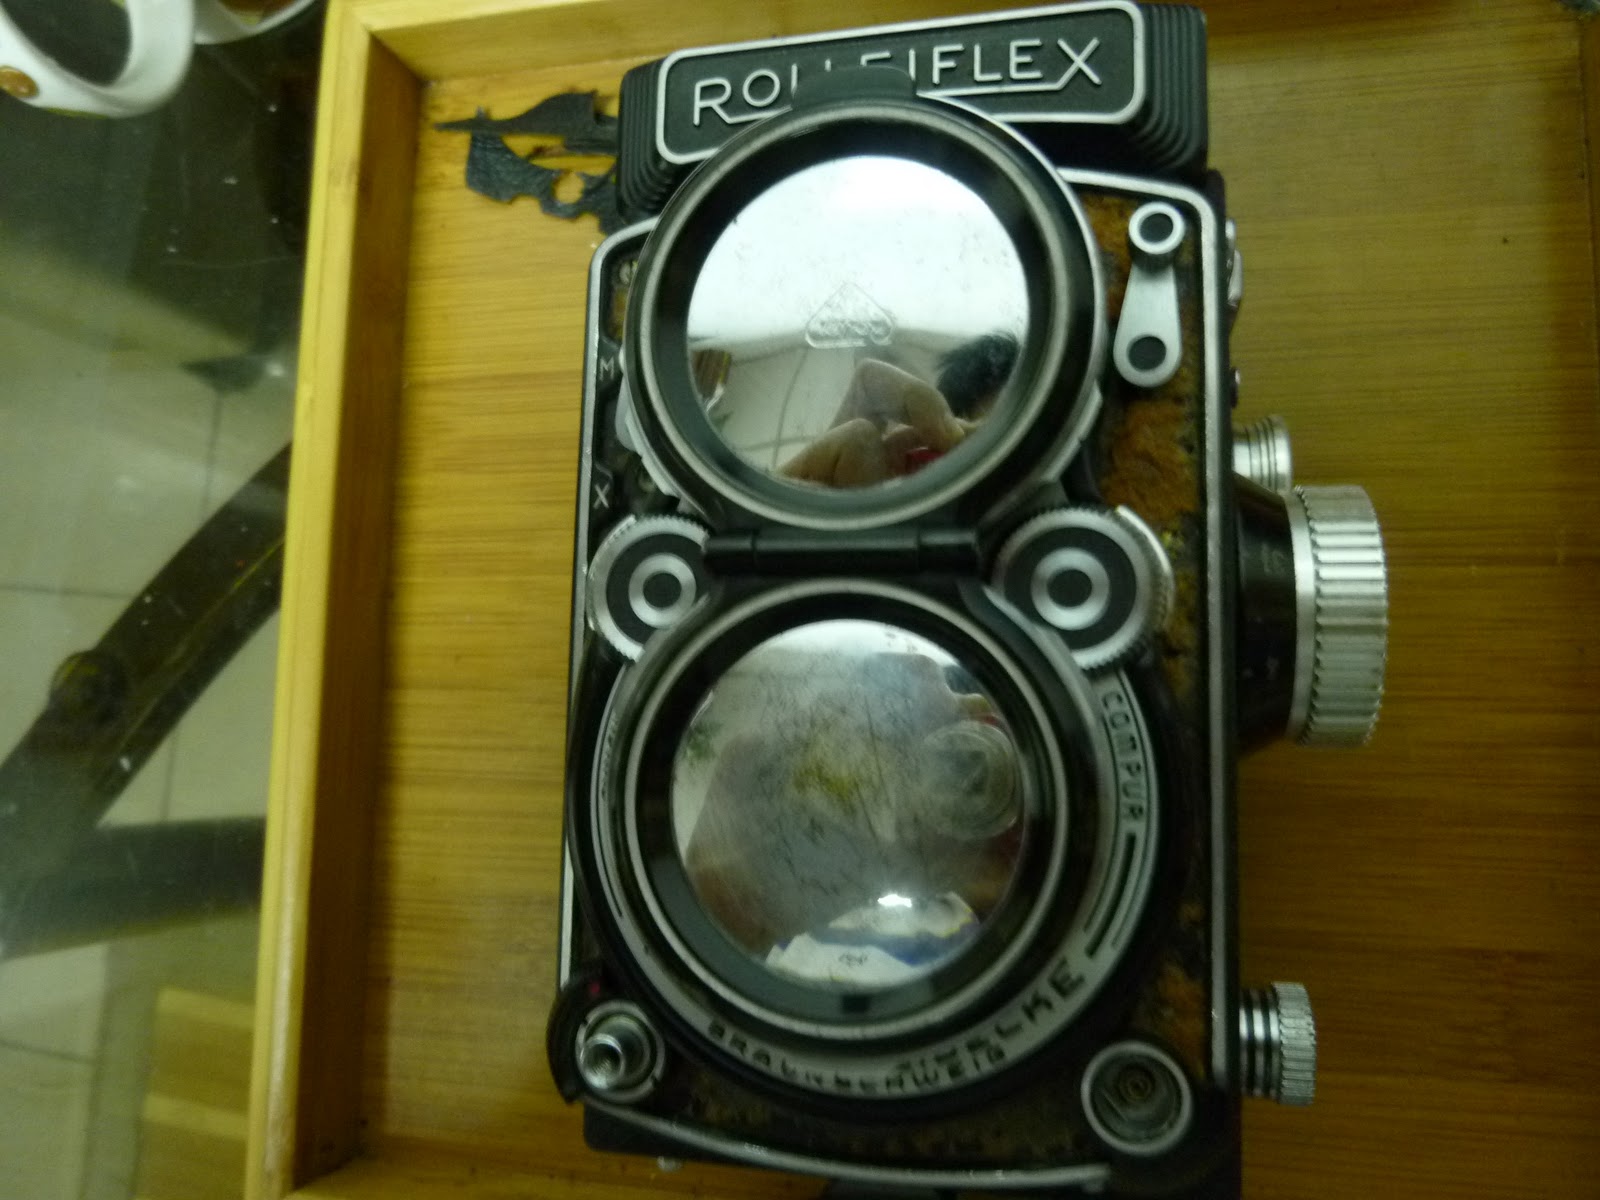
 My Rolleiflex 2.8C is in perfect working condition except for some slight web-like growth starts to creep in which I noticed and that is worrying me. I have to remove the old leatherette on the top cover before I can unscrew all the screws.There are all together 8 screws appearing on the top cover. Remove all the 6 screws except those 2 above and below the synchro/flash knob else you have to fix them back later.
Covering my lenses first is a precaution from those sharp objects and screwdrivers! Upon removing the cover, a small B release pin may fall off together with some washers from the 7 screws. Make sure you collect them before proceeding!
 Here you can have the chance to tinker with the smallest screw you ever seen on each side of the viewing lens. Removing them and turn anti-clockwise for your cleaning.If you have done this with the cheaper Seagull from China, tinkering with this rather expensive guy here shouldn't be an issue for you!
 Another screw here! Try getting ready a magnet as a safety net, just in case! The screw is so small that it won't kill you if you happen to swallow it!!
I have to see how serious is the creepy growth in there before deciding whether the wholes have to be cleaned! Looks like it's just on the first and 2nd level lenses and taking the whole lens  out is not necessary at the moment.
 Ah,the infected 1st level lens!
See the growth on it? At some point all lenses attracts fungus or creepy growth!
After cleaning with some mildew-fungus preventive solution, the lens looks clean now.
I take the opportunity to take out the taking lens as well. Both are right-threaded and turning anti-clockwise does it. Open up the Bulb aperture and hold it for a while to clean the lens behind the shutter as well! On my way out, I just have to make sure the positions of the shutter knob, synchro/flash knobs etc are in place before covering it.


The next stage is to cut out a new leatherette similar to this old one for my dear 50s' Rolleiflex 2.8C from Germany before my next flirting with it!!

Argus C4. Cleaning the viewfinder, adjusting the rangefinder and changing the leatherette!

 This American-made Argus C4 of the 50s' was acquired together with so much dirt and dust all over the camera! The rangefinder and viewfinder was practically now viewable with hand-drwan markings on the focusing knobs!
 The top cover can be opened easily and all the related viewfinder and rangefinder lenses cleaned. The loose rangefinder knob is now adjusted and coupled with the focusing ring of the lens. I took the opportunity to dust off all dirt from the mechanism and related parts. Luckily the shutter meachanism is working perfectly else the whole camera must be stripped for lubrication and adjustment. You can imagine how much dirt a classic camera can accumulate over these years in the attic!


 The old leatherette was removed and this classic is now blessed with a new croc-type leatherette! All the related aluminium or metals has been brushed in sync with the new leatherette!


Finally, my Argus C4 is now ready for action. Holding this classic really feeles good in my hands while focusing with the rangefinder is pretty smooth now.Handsome eh!